

Prerequisites
- A Clarifeye knowledge store with your MCP Server URL, Client ID, and Client Secret from the Deploy tab (see overview).
- A Claude Pro, Team, or Enterprise account.
The Claude Code plugin only needs the MCP Server URL — Claude Code handles sign-in itself, so no Client ID or Client Secret.
Step 1: Add a connector
1
Open the connectors page
Go to claude.ai/customize/connectors and click Add a connector.
2
Fill in the connector details
- Name:
Clarifeye - URL: Your MCP Server URL (e.g.
https://eu.app.clarifeye.ai/mcp)
3
Configure advanced settings
Click Advanced settings and enter: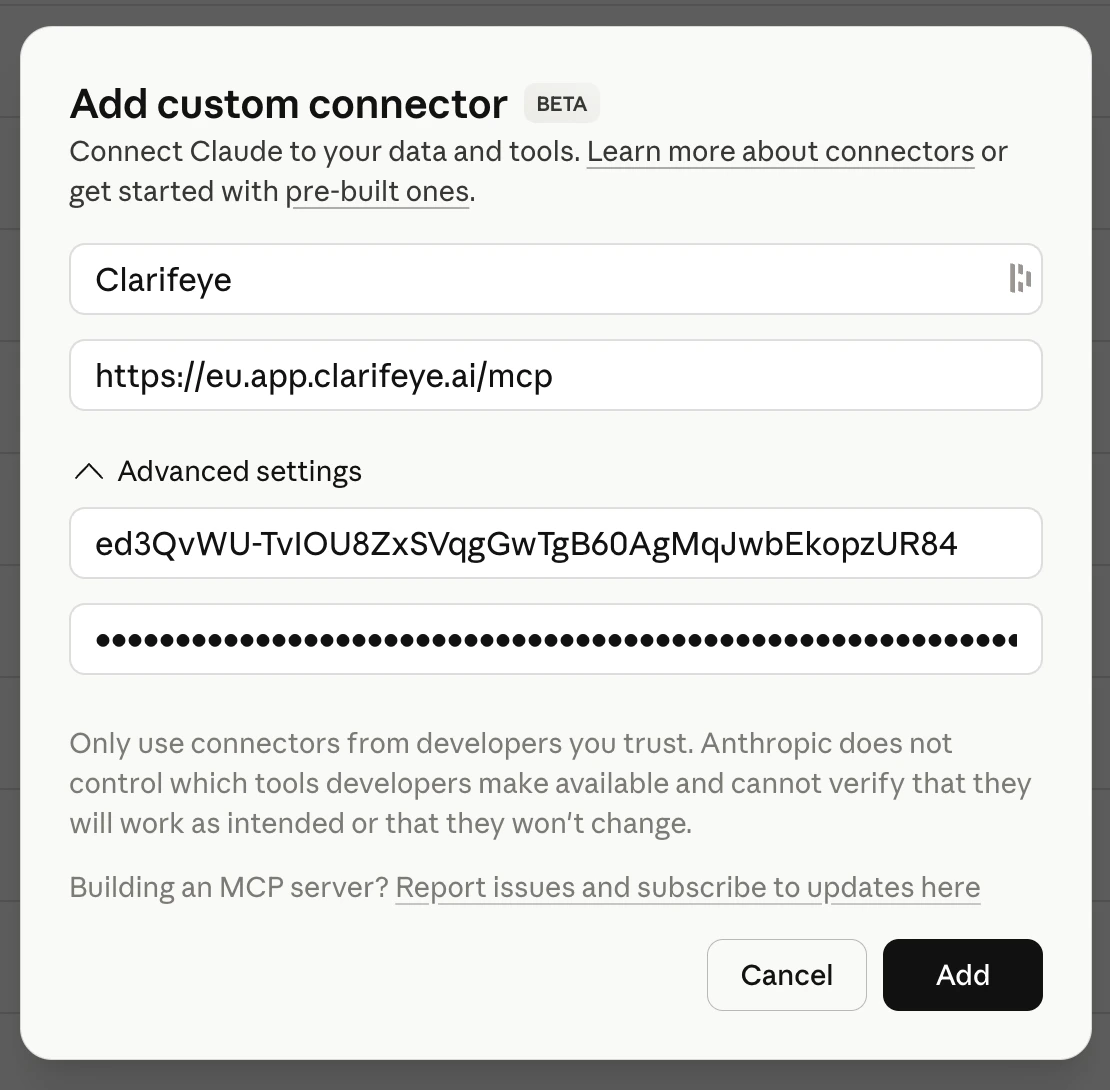
- Client ID: Your Client ID from the Deploy tab.
- Client Secret: Your Client Secret from the Deploy tab.
4
Add the connector
Click Add to save the connector.
Step 2: Create the skill
1
Open the skills page
Go to claude.ai/customize/skills and click Upload a skill.
2
Download and upload the skill file
Download the skill file from the Deploy tab of your Clarifeye knowledge store, then upload it here.
Step 3: Use Clarifeye in Claude
Type/clarifeye in any Claude conversation to activate the Clarifeye skill. Claude will connect to your knowledge store and you can start querying it, running tools, and invoking playbooks.
Claude Code
For Claude Code, install the Clarifeye plugin. It bundles the MCP server and the Clarifeye skill in one step, so you don’t have to add a connector and upload a skill separately.1
Add the Clarifeye marketplace
In a Claude Code session, run:
2
Install the plugin
3
Enter your MCP URL
When prompted for Clarifeye MCP URL, paste the MCP Server URL from the Deploy tab of your knowledge store (e.g.
https://eu.app.clarifeye.ai/mcp). One plugin serves every environment, so use your own URL.4
Sign in
The first time Claude Code uses the server, it opens your browser to sign in to Clarifeye. You can also sign in up front by running
/mcp.Keep the plugin up to date
Updates ship as new plugin versions. To update on demand:/plugin, go to Marketplaces, select clarifeye and choose Enable auto-update. Claude Code then refreshes the marketplace and its installed plugins on startup.
Administrators can turn this on for everyone by declaring the marketplace in a settings file: